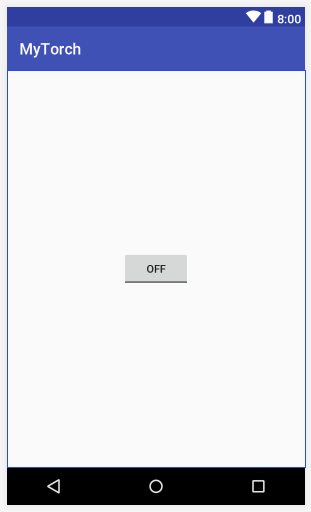
سلام دوستان در این پست ما میخواهیم ساخت اپلیکیشن اندروید برای روشن وخاموش کردن چراغ قوه ( flashlight ) تلفن همراهمان را آموزش دهیم .
ایجاد پروژه
اندروید استودیو را باز کرده و یک اکتیویتی خالی ایجاد کنید.
دقت کنید که API 23 را به عنوان حداقل انتخاب کنید . این به این دلیل است که API یی که ما میخواهیم استفاده کنیم در API 23 و بعد فقط در دسترس است و نسخه قدیمی تر این امکان رو ندارند .
ایجاد رابط کاربری
در اینجا شما میتوانید لایوت خود را طراحی کنید . بنابراین به activity_main.xml رفته و کد زیر را بنویسید
<?xml version="1.0" encoding="utf-8"?>
<android.support.constraint.ConstraintLayout xmlns:android="http://schemas.android.com/apk/res/android"
    xmlns:app="http://schemas.android.com/apk/res-auto"
    xmlns:tools="http://schemas.android.com/tools"
    android:layout_width="match_parent"
    android:layout_height="match_parent"
    tools:context=".MainActivity">

    <ToggleButton
        android:id="@+id/toggleButton"
        android:layout_width="wrap_content"
        android:layout_height="wrap_content"
        android:text="ToggleButton"
        app:layout_constraintBottom_toBottomOf="parent"
        app:layout_constraintEnd_toEndOf="parent"
        app:layout_constraintStart_toStartOf="parent"
        app:layout_constraintTop_toTopOf="parent" />

</android.support.constraint.ConstraintLayout>
همانطور که می بینید ما فقط یک ToggleButtonداریم که برای روشن و خاموش کردن نور فلش استفاده می کنیم.
اضافه کردن ویژگی به فایل Manifest
برای نوشتن این برنامه ما به یک ویژگی نیاز داریم . به ManifestAndroid.xml رفته و خط کدی که در زیر نشان داده شده است را اضافه کنید.
<?xml version="1.0" encoding="utf-8"?>
<manifest xmlns:android="http://schemas.android.com/apk/res/android"
    package="net.simplifiedcoding.mytorch">

    <!-- add this line that means our application will be using the device flash -->
    <uses-feature android:name="android.hardware.camera.flash" />

    <application
        android:allowBackup="true"
        android:icon="@mipmap/ic_launcher"
        android:label="@string/app_name"
        android:roundIcon="@mipmap/ic_launcher_round"
        android:supportsRtl="true"
        android:theme="@style/AppTheme">
        <activity android:name=".MainActivity">
            <intent-filter>
                <action android:name="android.intent.action.MAIN" />

                <category android:name="android.intent.category.LAUNCHER" />
            </intent-filter>
        </activity>
    </application>

</manifest>
ساختار کد
حالا کار زیادی برای انجام دادن ندارید. فقط یک ToggleButtonدارید که در آن باید یک Listener را به رویدادها ی خاموش و روشن متصل کنید . برای انجام اینکار کد زیر را بنویسید.
public class MainActivity extends AppCompatActivity {

    private ToggleButton toggleButton;

    @Override
    protected void onCreate(Bundle savedInstanceState) {
        super.onCreate(savedInstanceState);
        setContentView(R.layout.activity_main);


        toggleButton = findViewById(R.id.toggleButton);

        toggleButton.setOnCheckedChangeListener(new CompoundButton.OnCheckedChangeListener() {
            @Override
            public void onCheckedChanged(CompoundButton buttonView, boolean isChecked) {
               //called when the button status is changed

            }
        });
    }
بررسی اینکه آیا فلش وجود دارد یا خیر؟
وقتی برنامه وارد متد ()onCreate می شود .ابتدا باید بررسی کنید که آیا دستگاه دارای نور فلش(flash light) هست یا خیر؟. بنابراین اگر دستگاه فاقد چراغ قوه باشد باید اعلام کرد که فلش وجود ندارد و به برنامه خاتمه دهید.
پس متد ()onCreate به این شکل خواهد بود.
@Override
    protected void onCreate(Bundle savedInstanceState) {
        super.onCreate(savedInstanceState);
        setContentView(R.layout.activity_main);

        boolean isFlashAvailable = getApplicationContext().getPackageManager()
                .hasSystemFeature(PackageManager.FEATURE_CAMERA_FLASH);

        if (!isFlashAvailable) {
            showNoFlashError();
        }

        toggleButton = findViewById(R.id.toggleButton);

        toggleButton.setOnCheckedChangeListener(new CompoundButton.OnCheckedChangeListener() {
            @Override
            public void onCheckedChanged(CompoundButton buttonView, boolean isChecked) {

            }
        });
    }
حالا متد () showNoFlashError را صدا زده و اینگونه تعریف کنید.
  public void showNoFlashError() {
        AlertDialog alert = new AlertDialog.Builder(this)
                .create();
        alert.setTitle("Oops!");
        alert.setMessage("Flash not available in this device...");
        alert.setButton(DialogInterface.BUTTON_POSITIVE, "OK", new DialogInterface.OnClickListener() {
            public void onClick(DialogInterface dialog, int which) {
                finish();
            }
        });
        alert.show();
    }
مدیریت دوربین
به دو متغیرCameraManager ویک رشته برای Camera Id احتیاج دارید . زیرا اکثر دستگاهها چند دوربین دارند.
public class MainActivity extends AppCompatActivity {
    private CameraManager mCameraManager;
    private String mCameraId;
داخل متد ()onCreate این دو متغیر را دریافت کنید.
  @Override
    protected void onCreate(Bundle savedInstanceState) {
        super.onCreate(savedInstanceState);
        setContentView(R.layout.activity_main);

        boolean isFlashAvailable = getApplicationContext().getPackageManager()
                .hasSystemFeature(PackageManager.FEATURE_CAMERA_FLASH);

        if (!isFlashAvailable) {
            showNoFlashError();
        }

        //getting the camera manager and camera id
        mCameraManager = (CameraManager) getSystemService(Context.CAMERA_SERVICE);
        try {
            mCameraId = mCameraManager.getCameraIdList()[0];
        } catch (CameraAccessException e) {
            e.printStackTrace();
        }

        toggleButton = findViewById(R.id.toggleButton);

        toggleButton.setOnCheckedChangeListener(new CompoundButton.OnCheckedChangeListener() {
            @Override
            public void onCheckedChanged(CompoundButton buttonView, boolean isChecked) {
                //we will call this method to switch the flash
                switchFlashLight(isChecked);
            }
        });
    }
حالا شما می توانید داخل Listener ToggleButton متد ()switchFlashLight را صدا بزنیدو متغیر ischecked که از نوع Boolean است را مقدار دهی کنید که وضعیت فعلی دکمه ToggleButton را نشان می دهد که در حالت روشن است یا خاموش.
متد ()switchFlashLight کار اصلی را انجام می دهد . کد آن بصورت زیر است
 public void switchFlashLight(boolean status) {
        try {
            mCameraManager.setTorchMode(mCameraId, status);
        } catch (CameraAccessException e) {
            e.printStackTrace();
        }
    }
حالا میتوانید برنامه خود را اجرا کنید.
در اینجا کد کامل MainActivity.java را میتوانید ببینید:
package net.simplifiedcoding.mytorch;

import android.content.Context;
import android.content.DialogInterface;
import android.content.pm.PackageManager;
import android.hardware.camera2.CameraAccessException;
import android.hardware.camera2.CameraManager;
import android.os.Bundle;
import android.support.v7.app.AlertDialog;
import android.support.v7.app.AppCompatActivity;
import android.widget.CompoundButton;
import android.widget.ToggleButton;

public class MainActivity extends AppCompatActivity {


    private CameraManager mCameraManager;
    private String mCameraId;

    private ToggleButton toggleButton;

    @Override
    protected void onCreate(Bundle savedInstanceState) {
        super.onCreate(savedInstanceState);
        setContentView(R.layout.activity_main);

        boolean isFlashAvailable = getApplicationContext().getPackageManager()
                .hasSystemFeature(PackageManager.FEATURE_CAMERA_FLASH);

        if (!isFlashAvailable) {
            showNoFlashError();
        }


        mCameraManager = (CameraManager) getSystemService(Context.CAMERA_SERVICE);
        try {
            mCameraId = mCameraManager.getCameraIdList()[0];
        } catch (CameraAccessException e) {
            e.printStackTrace();
        }

        toggleButton = findViewById(R.id.toggleButton);

        toggleButton.setOnCheckedChangeListener(new CompoundButton.OnCheckedChangeListener() {
            @Override
            public void onCheckedChanged(CompoundButton buttonView, boolean isChecked) {
                switchFlashLight(isChecked);
            }
        });
    }

    public void showNoFlashError() {
        AlertDialog alert = new AlertDialog.Builder(this)
                .create();
        alert.setTitle("Oops!");
        alert.setMessage("Flash not available in this device...");
        alert.setButton(DialogInterface.BUTTON_POSITIVE, "OK", new DialogInterface.OnClickListener() {
            public void onClick(DialogInterface dialog, int which) {
                finish();
            }
        });
        alert.show();
    }

    public void switchFlashLight(boolean status) {
        try {
            mCameraManager.setTorchMode(mCameraId, status);
        } catch (CameraAccessException e) {
            e.printStackTrace();
        }
    }
}
امیدوارم که این آموزش مفید باشد.
 آموزش برنامه نویسی در مشهد


