در این مقاله نحوه دسترسی به داده ها در ASP.Net MVC از جدول پایگاه داده SQL با استفاده از Entity Framework و همچنین نحوه ایجاد لینک ها با استفاده از HTML helper های موجود ASP.Net MVC شرح داده می شود.
مرحله ۱ – دسترسی به داده ها در ASP.Net MVC
یک دیتابیس با مقداری داده نمونه با استفاده از اسکریپت SQL زیر ایجاد کنید .
CREATE DATABASE MVC;

USE MVC;

CREATE TABLE dbo.Students(ID int, Name varchar(50), Gender varchar(6), Fees int);

INSERT INTO dbo.Students
VALUES(1, 'Harry', 'Male', 2500);

INSERT INTO dbo.Students
VALUES(2, 'Jane', 'Female', 2400);

INSERT INTO dbo.Students
VALUES(3, 'Emma', 'Female', 2100);

INSERT INTO dbo.Students
VALUES(4, 'Roster', 'Male', 2500);

INSERT INTO dbo.Students
VALUES(5, 'Chris', 'Male', 2900);

INSERT INTO dbo.Students
VALUES(6, 'Evan', 'Male', 2200);

INSERT INTO dbo.Students
VALUES(7, 'Cathlie', 'Female', 2550);

INSERT INTO dbo.Students
VALUES(8, 'Jack', 'Male', 2500);

INSERT INTO dbo.Students
VALUES(9, 'Jone', 'Male', 2900);

INSERT INTO dbo.Students
VALUES(10, 'Videra', 'Female', 2550);

INSERT INTO dbo.Students
VALUES(11, 'Sara', 'Female', 2900);

INSERT INTO dbo.Students
VALUES(12, 'Mak', 'Male', 2500);

INSERT INTO dbo.Students
VALUES(13, 'Max', 'Male', 2550);

INSERT INTO dbo.Students
VALUES(14, 'Brock', 'Male', 2900);

INSERT INTO dbo.Students
VALUES(15, 'Eddie', 'Male', 2500);

INSERT INTO dbo.Students
VALUES(16, 'Edna', 'Female', 2500);
مرحله ۲ – دسترسی به داده ها در ASP.Net MVC
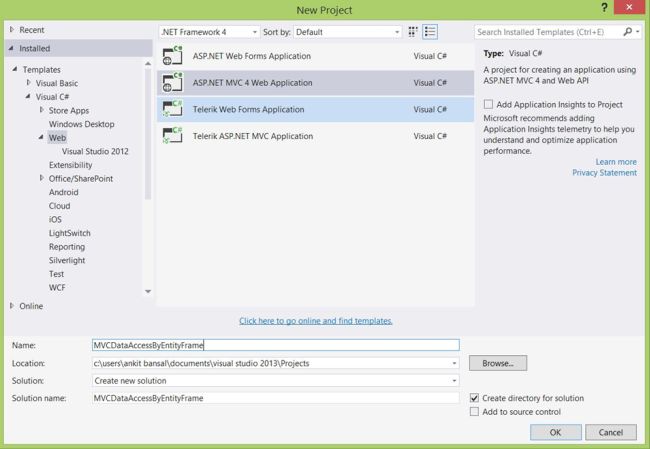
یک پروژه جدید MVC در ویژوال استدیو با نام MVCDataAccessByEntityFrame ایجاد کنید .


مرحله ۳
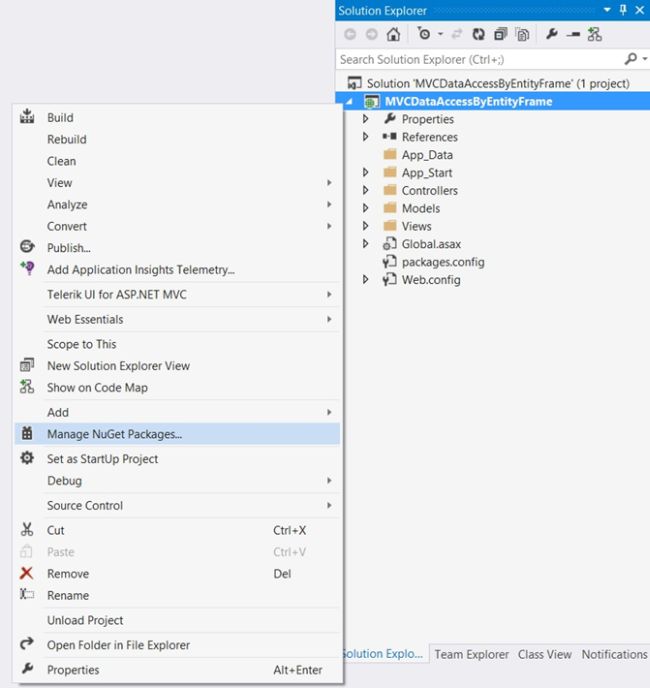
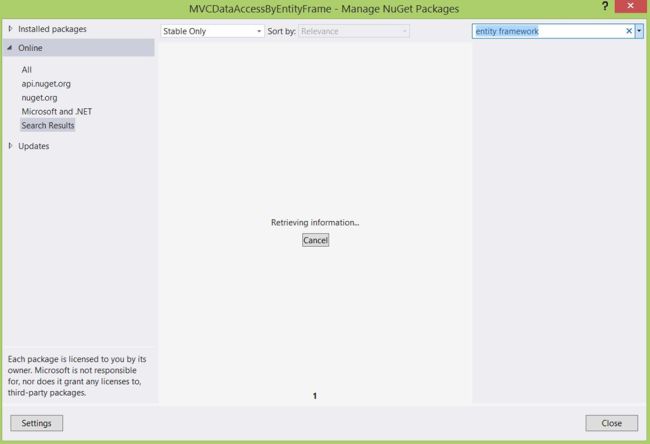
با استفاده از Nuget package manager در Solution Explorer فریم ورک Entity برروی پروژه نصب کنید.


مرحله ۴
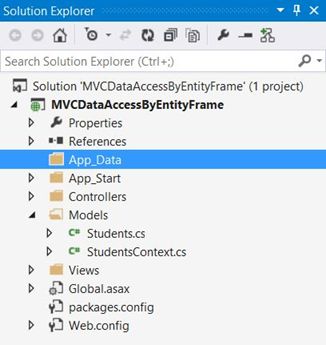
به پوشه Models در Solution Explorer رفته و ۲ فایل کلاس به آن اضافه کنید.

مرحله ۵
کدهای زیر را در کلاس های ایجاد شده در مرحله قبل کپی کنید.
Students.cs
using System.ComponentModel.DataAnnotations.Schema;

namespace MVCDataAccessByEntityFrame.Models
{
    [Table("Students")]
    public class Students
    {
        public int ID { get; set; }
        public string Name { get; set; }
        public string Gender { get; set; }
        public int Fees { get; set; }
    }
}
StudentsContext.cs
using System.Data.Entity;
namespace MVCDataAccessByEntityFrame.Models
{
    public class StudentsContext : DbContext
    {
        public DbSet<Students> Students { get; set; }
    }
}
مرحله ۶
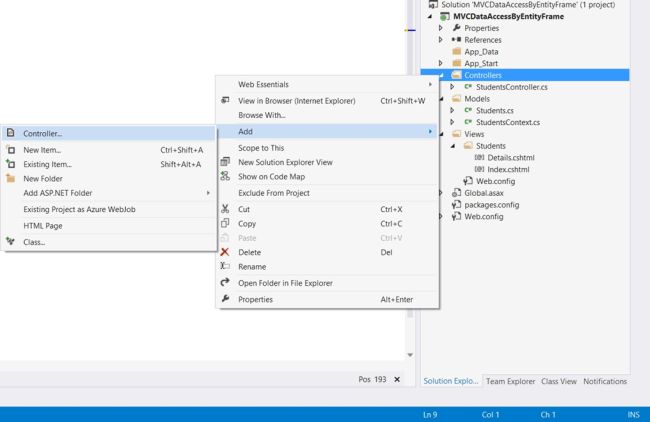
به پوشه Controllers رفته و یک کنترلر به آن اضافه کنید.

مرحله ۷
کدهای زیر را به کنترلر اضافه کنید.
using MVCDataAccessByEntityFrame.Models;
using System.Collections.Generic;
using System.Linq;
using System.Web.Mvc;

namespace MVCDataAccessByEntityFrame.Controllers
{
    public class StudentsController : Controller
    {
        public ActionResult Index()
        {
            StudentsContext studentsContext = new StudentsContext();
            List<Students> students = studentsContext.Students.ToList();
            return View(students);
        }
        public ActionResult Details(int id)
        {
            StudentsContext studentsContext = new StudentsContext();
            Students students = studentsContext.Students.Single(stu => stu.ID == id);
            return View(students);
        }

    }
}
مرحله ۸
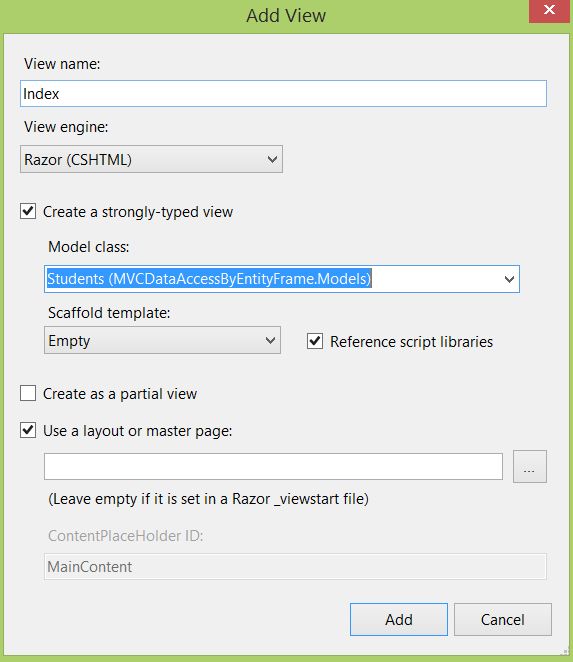
Ctrl + Shift + B فشرده و سپس برروی متد index راست کلیک کرده و گزینه add a view را انتخاب کنید.

مرحله ۹
کد های زیر را به Index.cshtml اضافه کنید.
@model IEnumerable<MVCDataAccessByEntityFrame.Models.Students>
@using MVCDataAccessByEntityFrame.Models;
@{
ViewBag.Title = "Students List";
}
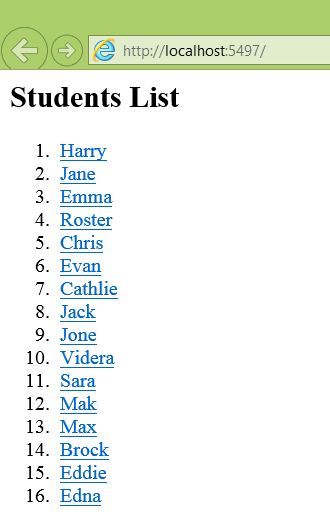
<h2>Students List</h2>
<ol start="1">
@foreach (Students students in @Model)
{
<li id="item">
@Html.ActionLink(students.Name, "Details", new { id = students.ID })
</li>
}
</ol>
مرحله ۱۰
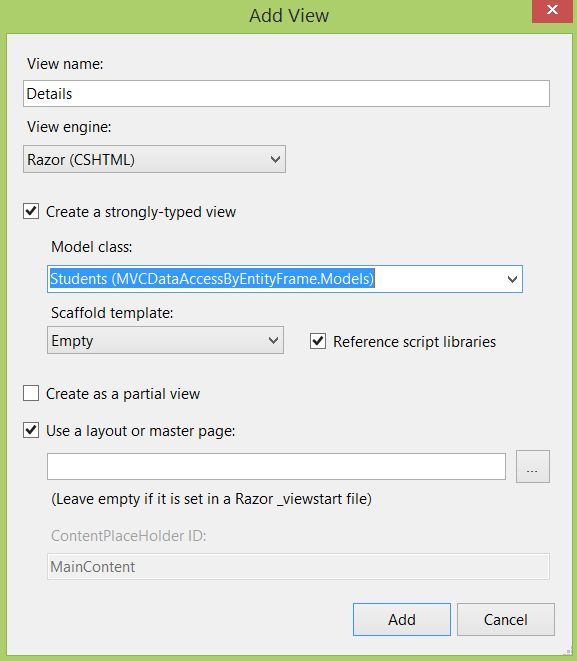
برروی متد Details راست کلیک کرده و گزینه add a view را دوباره انتخاب کنید.

مرحله ۱۱
کدهای زیر را به details.cshtml اضافه کنید.
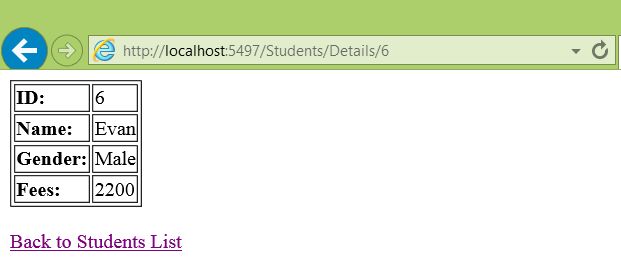
@model MVCDataAccessByEntityFrame.Models.Students

@{
    ViewBag.Title = "Students Details";
}

<table border="1">
    <tr>
        <td><b>ID:</b></td>
        <td>
            @Model.ID
        </td>
    </tr>
    <tr>
        <td><b>Name:</b></td>
        <td>@Model.Name</td>
    </tr>
    <tr>
        <td><b>Gender:</b></td>
        <td>@Model.Gender</td>
    </tr>
    <tr>
        <td><b>Fees:</b></td>
        <td>@Model.Fees</td>
    </tr>
</table>
<br />
@Html.ActionLink("Back to Students List", "Index")
مرحله ۱۲
به فایل web.config در پوشه Views در Solution Explorer رفته و کدهای زیر را به آن اضافه کنید .
<connectionStrings>
  <add name="StudentsContext" connectionString="server=ANKITBANSALPC; database = MVC; integrated security = SSPI" providerName="System.Data.SqlClient"/>
</connectionStrings>
مرحله ۱۳
به فایل Route.config در پوشه App_Start بروید و کد های زیر را در آن کپی کنید .
using System.Web.Mvc;
using System.Web.Routing;

namespace MVCDataAccessByEntityFrame
{
    public class RouteConfig
    {
        public static void RegisterRoutes(RouteCollection routes)
        {
            routes.IgnoreRoute("{resource}.axd/{*pathInfo}");

            routes.MapRoute(
                name: "Default",
                url: "{controller}/{action}/{id}",
                defaults: new { controller = "Students", action = "Index", id = UrlParameter.Optional }
            );
        }
    }
}
مرحله ۱۴
همه تغییرات را ذخیره کرده و F5 را فشرده تا پروژه اجرا شود سپس شما لیست دانش آموزان را خواهید دید که با کلیک برروی هر یک از آنها می توانید جزئیات اطلاعات هر یک را ببینید.


من محمد آذرنیوا، نویسنده و مدرس دوره های برنامه نویسی ، طراحی وب و تحلیل گر پایگاه داده هستم و قصد دارم در این وبسایت مطالب کاربردی در این زمینه را با شما به اشتراک بگذارم …