

WebView اندروید به شما این امکان را میدهد یک صفحه وب را تحت عنوان بخشی از برنامه کاربردی (اپلیکیشن) استفاده کنید. WebView، دارای تمامی ویژگیها و مشخصات یک مرورگر دسکتاپ از قبیل مدیریت تاریخچه، کوکیها و حمایت از HTML5 و غیره است. با استفاده از webview میتوانید اپلیکیشنهای بسیار جالبی را ایجاد کنید؛ مثل ادغام بازیهای HTML5 در یک اپلیکیشن. هدف از آموزش webview در اندروید استودیو ، یادگیری کاربرد اصلی WebView است که با آغاز از نمایش یک صفحه وب جهت ساخت یک مرورگر سادهی درون برنامهای که از ناوبری (هدایت) و نشانهگذاری (بوک مارک) پشتیبانی میکند، صورت میپذیرد. همچنین چگونگی استفاده از WebView با سایر عناصر از قبیل CollapsingToolbar و NestedScrollView برای رسیدن به تجربه اندروید بومی را نیز خواهید آموخت.
نحوه استفاده از WebView
اضافه کردن WebView در اپلیکیشن شما، شامل بیش از دو مرحله نیست. در ابتدا باید عنصر WebView را در طرح XML خود وارد کنید.
<WebView
    android:id="@+id/webView"
    android:layout_width="match_parent"
    android:layout_height="wrap_content"/>
دوم، باید URL خاص خود را در Webview فعالیت خود بارگذاری کنید. آنچه در ادامه آورده شده است، صفحه اصلی گوگل را در Web View بارگذاری میکند.
WebView webView = (WebView) findViewById(R.id.webView);
webView.loadUrl("http://google.com");


اگر چه بارگذاری یک url ساده بسیار آسان به نظر میرسد، سفارشیسازی WebView مستلزم وجود دانش کامل و جامعی در مورد WebView و روشهایی که در اختیار قرار میدهد، است. ما با روشهای اصلی که WebView ارائه میدهد، آغاز میکنیم و سپس، مرورگر سادهای را میسازیم که بعنوان مرورگر درون برنامهای کار میکند و گزینههای backward، forward و bookmark را در اختیار قرار میدهد. ما همه این موارد را یکی یکی و با آغاز از یک پروژه ساده در Android Studio فرا خواهیم گرفت.
ایجاد یک پروژه جدید در اندروید استودیو
- با استفاده از مسیر File ⇒ New Project در اندروید استودیو و با تکمیل جزئیات مورد نیاز، یک پروژه جدید را بسازید.
- از آنجا که نیاز به درخواستهای شبکه داریم، باید مجوز INTERNET را در AndroidManifest.xml اضافه کنیم.
AndroidManifest.xml
<?xml version="1.0" encoding="utf-8"?>
<manifest xmlns:android="http://schemas.android.com/apk/res/android"
    package="info.androidhive.webview" >

    <uses-permission android:name="android.permission.INTERNET"/>

    <application
        android:allowBackup="true"
        android:icon="@mipmap/ic_launcher"
        android:label="@string/app_name"
        android:supportsRtl="true"
        android:theme="@style/AppTheme.NoActionBar" >
        <activity android:name=".MainActivity" >
            <intent-filter>
                <action android:name="android.intent.action.MAIN" />

                <category android:name="android.intent.category.LAUNCHER" />
            </intent-filter>
        </activity>
    </application>
</manifest>
build.gradle را باز کنید و پشتیبانی Glide library را اضافه کنید. اینکار، برای بارگذاری تصویر در CollapsingToolbar مورد نیاز است. این مرحله، اختیاری است، ولی پیشنهاد میکنیم که آن را انجام دهید.
build.gradle
dependencies {
    ...
    // glide
    compile 'com.github.bumptech.glide:glide:3.7.0'
}
این پوشه webview_resources منابع را دانلود کنید و محتوا را به پروژه خود اضافه کنید. این پوشه، محتوی drawerها و assets های مورد نیاز برای این پروژه است.
آموزش webview در اندروید استودیو
فایلهای طرحبندی فعالیت اصلی خود (activity_main.xml و content_main.xml) و عنصر WebView را باز کنید. با اینکار، من CoordinatorLayout, Toolbar و ProgressBar را که در حال بارگذاری صفحه وب نشان داده میشوند، نیز اضافه میکنم.
activity_main.xml
<?xml version="1.0" encoding="utf-8"?>
<android.support.design.widget.CoordinatorLayout xmlns:android="http://schemas.android.com/apk/res/android"
    xmlns:app="http://schemas.android.com/apk/res-auto"
    android:id="@+id/main_content"
    android:layout_width="match_parent"
    android:layout_height="match_parent"
    android:background="@android:color/white"
    android:fitsSystemWindows="true">

    <android.support.design.widget.AppBarLayout
        android:id="@+id/appbar"
        android:layout_width="match_parent"
        android:layout_height="@dimen/detail_backdrop_height"
        android:fitsSystemWindows="true"
        android:theme="@style/ThemeOverlay.AppCompat.Dark.ActionBar">

        <android.support.design.widget.CollapsingToolbarLayout
            android:id="@+id/collapsing_toolbar"
            android:layout_width="match_parent"
            android:layout_height="match_parent"
            android:fitsSystemWindows="true"
            app:contentScrim="?attr/colorPrimary"
            app:expandedTitleMarginEnd="64dp"
            app:expandedTitleMarginStart="48dp"
            app:expandedTitleTextAppearance="@android:color/transparent"
            app:layout_scrollFlags="scroll|exitUntilCollapsed">

            <RelativeLayout
                android:layout_width="wrap_content"
                android:layout_height="wrap_content">

                <ImageView
                    android:id="@+id/backdrop"
                    android:layout_width="match_parent"
                    android:layout_height="match_parent"
                    android:fitsSystemWindows="true"
                    android:scaleType="centerCrop"
                    app:layout_collapseMode="parallax" />
            </RelativeLayout>

            <android.support.v7.widget.Toolbar
                android:id="@+id/toolbar"
                android:layout_width="match_parent"
                android:layout_height="?attr/actionBarSize"
                app:layout_collapseMode="pin"
                app:popupTheme="@style/ThemeOverlay.AppCompat.Light" />

        </android.support.design.widget.CollapsingToolbarLayout>

    </android.support.design.widget.AppBarLayout>

    <include layout="@layout/content_main" />

    <ProgressBar
        android:id="@+id/progressBar"
        style="@style/Widget.AppCompat.ProgressBar.Horizontal"
        android:layout_width="match_parent"
        android:layout_height="wrap_content"
        android:layout_marginTop="-7dp"
        android:indeterminate="true"
        app:layout_behavior="@string/appbar_scrolling_view_behavior" />

</android.support.design.widget.CoordinatorLayout>
content_main.xml
<?xml version="1.0" encoding="utf-8"?>
<android.support.v4.widget.NestedScrollView xmlns:android="http://schemas.android.com/apk/res/android"
    xmlns:app="http://schemas.android.com/apk/res-auto"
    android:layout_width="match_parent"
    android:layout_height="match_parent"
    android:fadeScrollbars="false"
    android:scrollbarFadeDuration="0"
    app:layout_behavior="@string/appbar_scrolling_view_behavior">


    <WebView
        android:id="@+id/webView"
        android:layout_width="match_parent"
        android:layout_height="wrap_content" />

</android.support.v4.widget.NestedScrollView>
اکنون، MainActivity.java را باز کنید و کد زیر را تغییر دهید. در اینجا متد initCollapsingToolbar () به طور کامل غیر مرتبط با WebView است، اما وقتی صفحه وب نمایش داده میشود ، افکتی را نشان می دهد . متد Glide برای نمایش تصویر هدر در نوار ابزار مورد استفاده قرار میگیرد.
MainActivity.java
package info.androidhive.webview;
import android.content.Intent;
import android.os.Bundle;
import android.support.design.widget.AppBarLayout;
import android.support.design.widget.CollapsingToolbarLayout;
import android.support.v7.app.AppCompatActivity;
import android.support.v7.widget.Toolbar;
import android.text.TextUtils;
import android.view.MotionEvent;
import android.view.View;
import android.webkit.WebView;
import android.webkit.WebViewClient;
import android.widget.ImageView;
import android.widget.ProgressBar;
import com.bumptech.glide.Glide;
import com.bumptech.glide.load.engine.DiskCacheStrategy;
public class MainActivity extends AppCompatActivity {
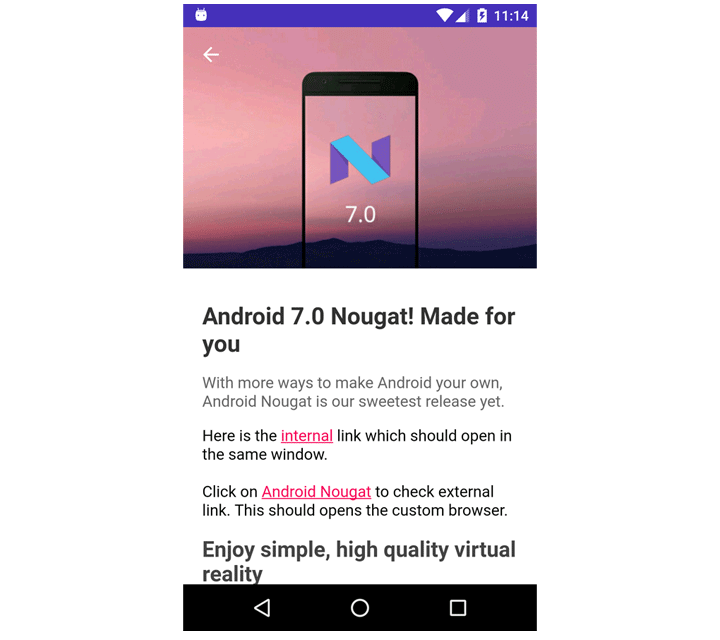
private String postUrl = "https://api.androidhive.info/webview/index.html";
private WebView webView;
private ProgressBar progressBar;
private ImageView imgHeader;
@Override
protected void onCreate(Bundle savedInstanceState) {
super.onCreate(savedInstanceState);
setContentView(R.layout.activity_main);
Toolbar toolbar = (Toolbar) findViewById(R.id.toolbar);
setSupportActionBar(toolbar);
getSupportActionBar().setDisplayHomeAsUpEnabled(true);
webView = (WebView) findViewById(R.id.webView);
progressBar = (ProgressBar) findViewById(R.id.progressBar);
imgHeader = (ImageView) findViewById(R.id.backdrop);
// initializing toolbar
initCollapsingToolbar();
webView.getSettings().setJavaScriptEnabled(true);
webView.loadUrl(postUrl);
webView.setHorizontalScrollBarEnabled(false);
}
/**
* Initializing collapsing toolbar
* Will show and hide the toolbar txtPostTitle on scroll
*/
private void initCollapsingToolbar() {
final CollapsingToolbarLayout collapsingToolbar =
(CollapsingToolbarLayout) findViewById(R.id.collapsing_toolbar);
collapsingToolbar.setTitle(" ");
AppBarLayout appBarLayout = (AppBarLayout) findViewById(R.id.appbar);
appBarLayout.setExpanded(true);
// hiding & showing the txtPostTitle when toolbar expanded & collapsed
appBarLayout.addOnOffsetChangedListener(new AppBarLayout.OnOffsetChangedListener() {
boolean isShow = false;
int scrollRange = -1;
@Override
public void onOffsetChanged(AppBarLayout appBarLayout, int verticalOffset) {
if (scrollRange == -1) {
scrollRange = appBarLayout.getTotalScrollRange();
}
if (scrollRange + verticalOffset == 0) {
collapsingToolbar.setTitle("Web View");
isShow = true;
} else if (isShow) {
collapsingToolbar.setTitle(" ");
isShow = false;
}
}
});
// loading toolbar header image
Glide.with(getApplicationContext()).load("https://api.androidhive.info/webview/nougat.jpg")
.thumbnail(0.5f)
.crossFade()
.diskCacheStrategy(DiskCacheStrategy.ALL)
.into(imgHeader);
}
}
اکنون، اگر برنامه را اجرا کنید، میتوانید مشاهده کنید که webpage در WebView در حال بارگذاری است. اکنون، به بررسی روشهای مفید دیگری که web view ارائه میدهد، میپردازیم.

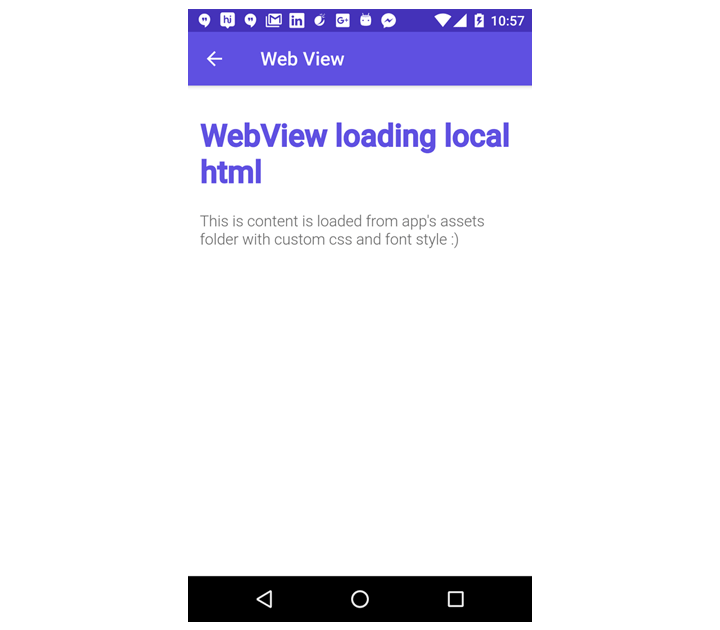
ممکن است در برخی موارد لازم باشد یک صفحه وب را بجای بارگذاری از یک url، از محل ذخیرهسازی محلی اپلیکیشن بارگذاری نمایید. برای انجام اینکار میتوانیم تمامی html, css و فونتها را در پوشه assets نگهداری نموده و آنها را از آنجا بارگذاری نماییم.
یک پوشه جدید با نام assets را در src/main ایجاد کنید (src/main/assets) و html, css و فونتها را در آنجا قرار دهید. من در حال حاضر، یک فایل html با نام sample.html را نگه میدارم. همچنین دو فونت سفارشی Roboto-Light.ttf و Roboto-Medium.ttf را برای اِعمال فونت سفارشی در CSS اضافه میکنم. امیدوارم شما این منابع را از اینجادانلود کنید.


sample.html
<!doctype html>
<html>
<head>
    <meta charset="utf-8">
    <title>Android WebView Tutorial</title>
    <style type="text/css">
     @font-face {
         font-family: 'roboto';
         src: url('Roboto-Light.ttf');
     }

     @font-face {
         font-family: 'roboto-medium';
         src: url('Roboto-Medium.ttf');
     }

    body{
        color:#666;
        font-family: 'roboto';
        padding: 0.3em;
     }
    h1{
         color:#5f50e1;
         font-family: 'roboto-medium';
     }

    </style>
</head>

<body>
<h1>WebView loading local html</h1>
This is content is loaded from app's assets folder with custom css and font style <img draggable="false" class="emoji" alt="🙂" src="https://s.w.org/images/core/emoji/2.3/svg/1f642.svg">
</body>
</html>
فراخوانی کد زیر در MainActivity.java شما، نمونه sample.html را از پوشه assets بارگیری میکند.
// Loading local html file into web view
webView.loadUrl("file:///android_asset/sample.html");

میتوانید با متد setJavaScriptEnabled ()، قابلیت جاوا اسکریپت را در یک صفحه وب فعال یا غیرفعال کنید.
// enable / disable javascript
webView.getSettings().setJavaScriptEnabled(true);
فعالسازی Zooming Controls
WebView، کنترلهای مربوط به زوم سرخود را جهت انجام بزرگنمایی یا کوچکنمایی صفحه وب فراهم میکند. این کنترلها، در هنگامی که در خواندن فونتهای کوچک در صفحه وب مشکل دارید به شما کمک میکند. کد زیر موجب فعالسازی کنترلهای زوم در صفحه وب میشود.
/**
* Enabling zoom-in controls
* */
webView.getSettings().setSupportZoom(true);
webView.getSettings().setBuiltInZoomControls(true);
webView.getSettings().setDisplayZoomControls(true);


من محمد آذرنیوا، نویسنده و مدرس دوره های برنامه نویسی ، طراحی وب و تحلیل گر پایگاه داده هستم و قصد دارم در این وبسایت مطالب کاربردی در این زمینه را با شما به اشتراک بگذارم …